Ricotta Gnocchi

DSC03098Ricotta gnocchi with pulled chicken, mushroom & pepper in an onion & herb broth, garnished with crispy chicken skins.

So one of my goals over the past three or four years has been to perfect the most masterful of Italian culinary creations… ricotta gnocchi. Truthfully, the first 15-20 times I’ve made them they weren’t that good, actually they were downright bad… but I’ve been steadily getting better. While not yet perfect, I’d say that my ricotta gnocchi are better than a vast majority of those that I’ve had at restaurants, and that’s saying something because it’s pretty much a sure thing that if I see ricotta gnocchi on a menu I’m ordering them.

So what you’re aiming for is a heavenly pillow of cheesy pasta deliciousness that should melt in your mouth. The way to achieve this is with as little flour as you can possibly use and still make a quasi-dough. That is the tricky part. In the beginning you’ll be making your gnocchi dough and think it’s too loose and add more flour to make it easier to work with… wrong. So let’s get into the recipe and the instructions, and then I’ll explain why that’s wrong.

Serves 4 (moderate sized portions mixed with other ingredients)

Ingredients:
1lb Whole Milk Ricotta Cheese (don’t skimp and use a store brand, use fresh or a quality brand, trust me!)
1c Finely Grated Parmesan Cheese
1 Large Egg
1c All Purpose Flour (3/4c for gnocchi, 1/4c to flour rolling surface)
1tsp Fresh Ground Black Pepper (I prefer a five peppercorn blend)

Directions:
Traditionally you would make these by hand, but as I’ve said in other posts, Kitchen Aids were invented for a reason! I’m sure for some purists this is gnocchi blasphemy, but I’m happier with the consistency of the finished product this way.

In a mixing bowl add your ricotta, parmesan, egg and black pepper. Mix using the paddle attachment until everything is well integrated. Add your 3/4c of flour and mix at a medium speed until blended. You should be left with a relatively loose dough. It will have a consistency just slightly denser than ricotta cheese.

Spread the remaining 1/4c of flour on your rolling surface. Also set up a baking sheet with wax paper, and lightly flour the paper surface, this is what you will be placing your cut gnocchi on.

Coat your hands in the flour from the rolling surface and scoop a handful of the gnocchi dough onto the surface. Very gently, roll your dough along the table and form a rope roughly 3/4″ thick. Be very careful in this step as it’s the most crucial. You only want a layer of flour on the outside of the rope with the interior still being somewhat loose. You DO NOT want to get more flour through the entire dough, just the outside to hold it together. Too much flour and you’re left with dense lead pasta balls that will sit in the pit of your stomach ad infinitum… we’ve all had those before, you don’t want that!

Using a floured knife cut your rope into 1/2″ sections and place on the baking sheet. Don’t worry if they look small, they will expand slightly when you boil them. Repeat until done.

Put the baking sheet in the freezer to allow the gnocchi to set. Do not take out of the freezer until ready to use, you can drop them in the water while frozen, actually it’s best if you do to hold form. You can make your gnocchi well in advance, or even make bigger batches to keep frozen and take as you need it. However, if your gnocchi are going to spend significant time in the freezer either cover the baking sheet with plastic wrap, or more preferable, separate the gnocchi into serving sizes and put them into freezer friendly Ziploc bags. If you leave them uncovered in the freezer eventually they will take on an unpleasant freezer-burned flavor.

To cook the gnocchi bring salted water to a boil in a medium sauce pot. You don’t need a full blown roiling boil on this, bring to a boil and then reduce to medium-high heat for cooking. Add your gnocchi in small batches, no more than 15-20 at a time. Make sure you gently stir the water along the bottom edge of the pot as soon as you put them in to make sure the gnocchi don’t stick to the bottom. It will only take one or two minutes to cook through, they will float to the surface when done. Gently remove from the water using a slotted spoon.

So those are the directions… Now one of the most beautiful things about gnocchi is that they’re such a blank canvas. You can do so many things with them! You can remove them from the water and sautee them in butter to get a nice browned crispiness, or you can put them in sauce, tossed them with vegetables… you name it! You can also play with what you put in the gnocchi. Want to do lemon zest, go for it! Nutmeg, sure! Cayenne for some kick, you got it!

So I’ve given you the base, or you could say I’ve given you the easel, canvas and paint, now it’s time to make your own art!  Let me see what you’ve got, please feel free to share your gnocchi dishes with me! I’ve put in a contact form, let me know your successes, or even failures. I look forward to hearing from you.

In the meantime, crack open a bottle of something and relax, life is short, enjoy it. 😉

Advertisement

Wine Review – 2012 LOLA Chardonnay, Sonoma Coast

DSC03206

When I decided to start this website my ultimate goal was to share my knowledge and passion for all things food and liquid with each of you, in the hope that it would open your eyes and minds to things that maybe you’ve never seen or thought of before. To expand your horizons, so to speak. I strive to do this not only through sharing recipes and wine pairings with you all, but to also introduce you to wines and wineries that maybe you aren’t familiar with, talk about wine and food trends, etc. When I was a wine director at restaurants, one of my absolute favorite things was to expand peoples horizons, get them outside of their norm. I never have, and never will, understand people that are content to drink the same wines over and over and over again. Wine isn’t a marriage, you don’t need to commit to just one!

So with this in mind, I will regularly be posting a series of articles titled “A wine you should know…”In these articles I will be introducing specific wines, or wineries, that are outside of the mainstream that I find to be noteworthy.

For my first installment of this series is devoted to the 2012 vintage of LOLA Chardonnay from Sonoma Coast.

Let’s face it, Chardonnay from California has developed a bad rap in recent years. For some reason that God-awful trend of over-oaked, 100% malolactic fermented, buttery, chewy, high alcohol Chardonnay was huge from the mid-90’s until just a couple of years ago… and there are still a TON of people that look for that. And because that was what was hot, that’s how most producers started to style their Chardonnay to help drive sales.

Luckily that trend is finally starting to turn in regards to the consumer base, and there are now some people that will adamantly avoid California Chardonnays because they no longer want buttered popcorn in a glass. So the new challenge is to prove to consumers that not all Cali Chards are THAT.

Here’s where LOLA steps in…

LOLA was started in 2008 by a gentleman named Seth Cripe. Seth worked for Caymus for about a dozen years and by the end of his tenure he was running their vineyards, and he was also a key figure in their Belle Glos project which had him traveling to France for months at a time to learn the art of Burgundian wine practices.

Usually when people hear that Seth worked at Caymus for that long and started his own winery, the first question is “How’s his Cab!?”

Nope. Sorry. Wrong.

During his stays in France Seth developed a deep seeded love for Chardonnay and Pinot Noir, and chose to move in that direction when finally going off on his own. His goal, as he states it, is to

[create] naturally elegant, high quality, and honestly priced wines stem from our wine maker’s vision of making great wines that can enjoyed by all. Intended for every day drinking, our wines are made for both a wine novice as well as a connoisseur with a more refined palate.”

Mission accomplished sir!

So I chose to focus solely on the Chardonnay this go-around (though don’t be surprised if you see something posted soon on his North Coast Pinot Noir or RRV Pinot Noir, both are fantastic!). The wine is 100% Chardonnay sourced from Occidental and Bloomfield, two top tier Chardonnay vineyards.

In the glass the wine shows a pale golden hue. On the nose there are notes of Gala apple, pineapple, and candied lemon, along with a very subtle oak presence. On the palate the first thing, and the last thing, to hit you is very pleasant acidity. It literally travels from the tip of your tongue, along the edges and to the back. Mid palate you’ll find beautifully balanced notes of tropical fruit and citrus zest, with the oak once again working as a supporting actor, and there is just the slightest undertone of minerality. Despite minimal oak aging (only 20% neutral French barrel, 80% stainless) and malolactic fermentation (only 20%) the wine still has good weight and depth. I find that it rides the middle ground between being Chablisian and typical Californian. Think Bourgogne Blanc from declassified Meursault or Puligny-Montrachet and you’ll be hitting pretty close to the mark. The finish is a little hot despite only being 13% alcohol, but not unpleasantly so.

This wine is perfect as an aperitif, or paired with poached pear or apple, cheese, white fish or poultry.

Now it could be difficult for some of you to find, as of now LOLA is only distributed in California, Florida, New Jersey, New York, Alabama, Tennessee, Colorado and Louisiana, but they will be expanding, and you can also order directly from their site (http://www.lolawines.com/). In addition the Chardonnay is relatively small production, with only 1,400 cases made for this 2012 vintage, which means there is not a ton of it to go around. If you live in one of those states, go to your local store or restaurant as ask if they carry it, if they don’t, tell them to get it! If you live outside of those states, well, God invented the internet, credit cards and FedEx for a reason… lol.

Typical retail price: $19-25

So my score for the 2012 LOLA Chardonnay… 90 points. Well done Mr. Cripe!

Oh, and for any of you who are fans of Bottarga (smoked mullet roe that sells for roughly $100/lb when imported from Italy), check out this article: http://www.nytimes.com/2013/07/24/dining/bottarga-an-export-that-stays-at-home.html?_r=0. Seth is making some Bottarga from California that’s just as good as it’s Italian counterpart at a fraction of the price. It’s all the rage in NYC right now!

Pork & Mushroom Agnolotti and Parmesan Panna Cotta (w/ wine pairings)

Pork & Mushroom Agnolotti (recipe available)

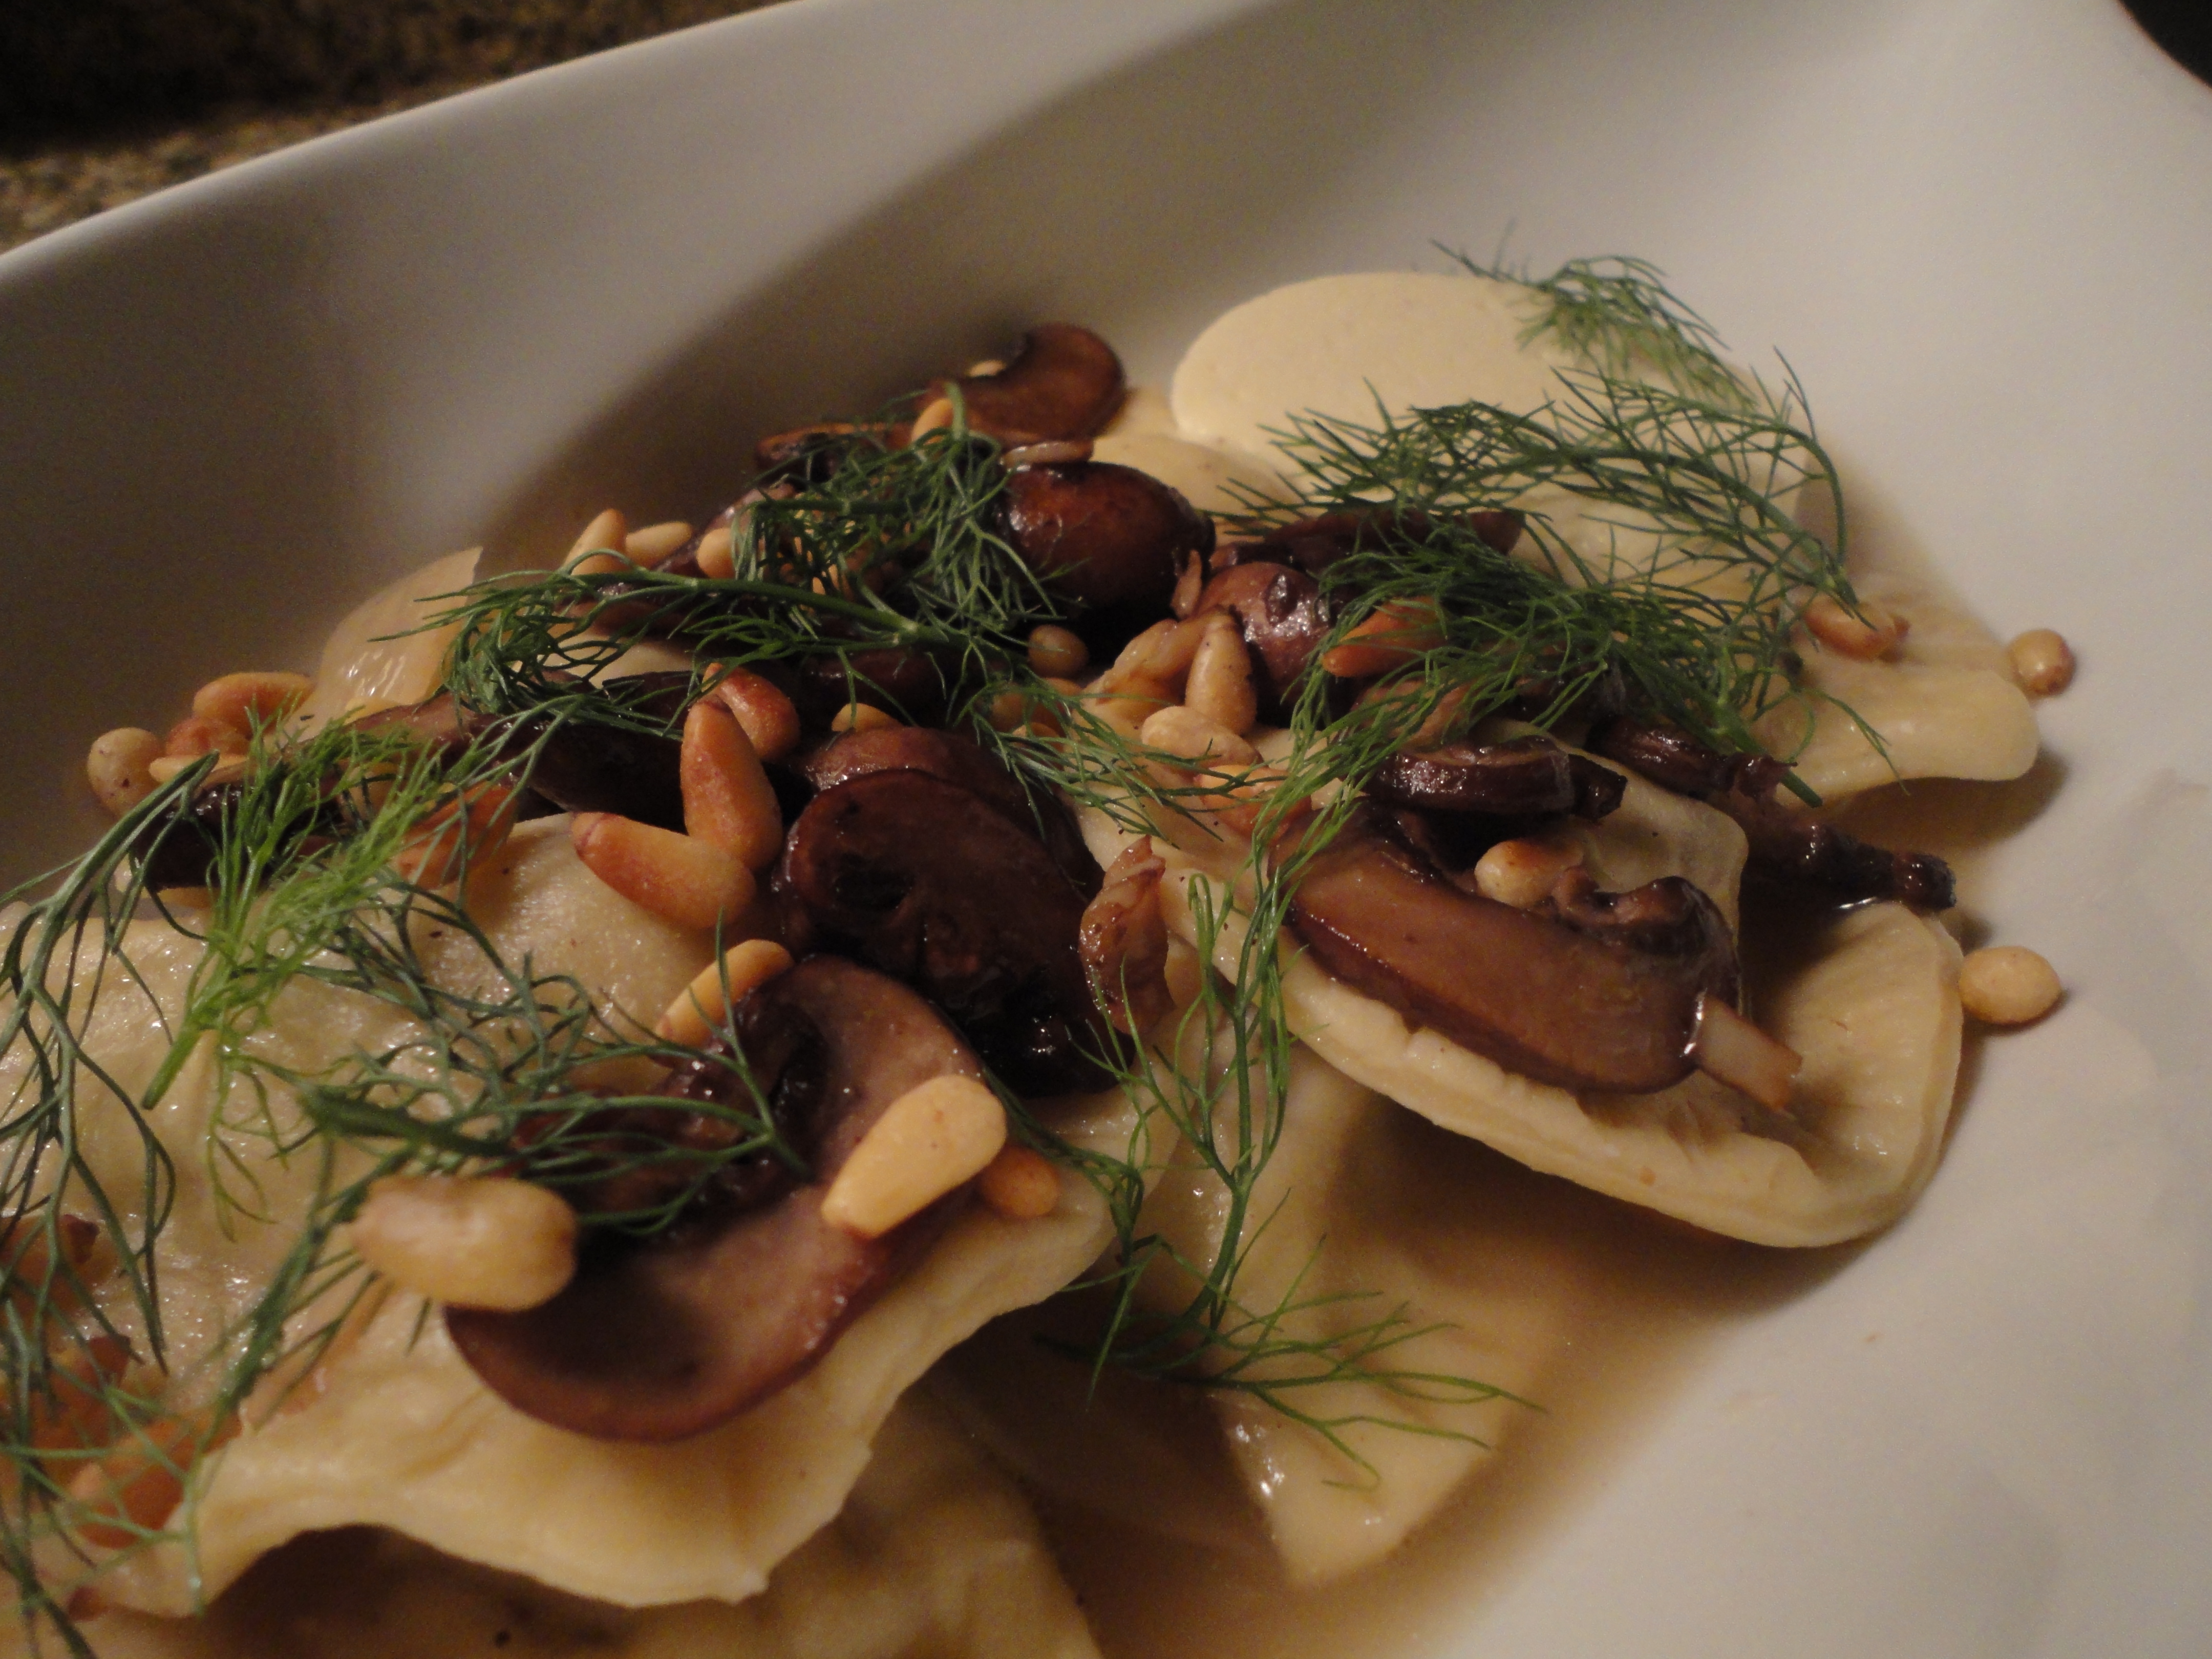
So this dish was originally going to be raviolis, but after taking a mental picture of the finished product the round panna cotta and round raviolis were a bit redundant. Quick fix, agnolotti! Agnolotti is simply pasta dough folded over a filling, and the shape is traditionally a half circle (though I have seen some square agnolotti… blasphemy!). Think of it like an Italian pierogi or wonton.

I actually came up with this dish after tasting the wine I wanted to drink that evening, a Brunello di Montalcino produced by Salicutti, which was a beautiful balance of fruit, earth tones and super subtle anise notes.

Below is the recipe, and below that is my recommended pairings… Let me know what you think! Please feel free to reach out to me if you have any questions or to let me know how it came out.

Serves 4

Ingredients

Panna Cotta:
1c Whole Milk
1c Heavy Cream
3/4c Grated Parmesan
1/2tsp Salt
2tsp Ground Black Pepper (I prefer a fresh ground five peppercorn blend)
2 envelopes Powdered Gelatin (1/2oz total)

Filling (Pork):
1lb Pork Neck
32oz Beef Broth
1/2c Red Wine
1c Water
1tsp Salt
1tsp Dried Parsley
1tsp Ground Black Pepper
1tsp Garlic Powder

Filling (Mushrooms):
4oz Mushrooms, chopped
2 Cloves Garlic, chopped
1tbsp Unsalted Butter
1/2tsp Salt
1/2tsp Ground Black Pepper

Filling (Remainder):
5oz Ricotta Cheese (I use whole milk)
1/4c Grated Parmesan
1/2tsp Salt
1/2tsp Ground Black Pepper
1/2tsp Garlic Powder

Broth:
1 Bulb Fennel (Anise), sliced (save fronds for garnish)
32oz Chicken Stock
1c White Wine
2tbsp Unsalted Butter
2 Cloves Garlic, chopped
1/2tsp Salt
1/2tsp Ground Black Pepper
2tsp Granulated Sugar

Pasta:
3c All Purpose Flour
3 Large Eggs
1/2c Water
1tbsp Olive Oil

Topping:
8oz Mushrooms, sliced
2 Cloves Garlic, chopped
1tbsp Unsalted Butter
1/2tsp Salt
1/2tsp Ground Black Pepper
2oz Pine Nuts

Ok, soooooo… you’ll have to bear with me on the directions because everything happens at different times. Like I said up above, if you have a question don’t hesitate to reach out. I’m still new to this recipe writing business…

So the first thing you need to get moving is the pork neck for the agnolotti filling. It’s going to take four hours to cook. You could employ a few different methods, a medium sized sauce pot on low heat (initially bring to a boil then reduce to low), in the oven at 300 degrees (covered with foil in a baking pan) or a crock pot… I used a crock pot. Add all of the ingredients for the Pork portion of the filling into the crock pot, stir, and set for four hours.

Just after you get your pork going, you have to start on the panna cotta, which takes roughly three to four hours to set. Heat a sauce pan at medium and add your milk, cream, salt and pepper, stirring periodically. Once the fluids heat add your parmesan, stirring constantly until melted. Make sure you keep stirring, if you stop the cheese could sink to the bottom of the pot and start to burn, ruining the batch. Once the cheese is fully integrated into the mixture remove the pot from heat and slowly add your gelatin powder while constantly whisking. If you dump it all in at once it will clump together, so add slowly and vigorously stir. Once the powder is dissolved pour the liquid into a 5×9 pan and allow to cool slightly at room temperature. If you prefer you can also pour the liquid into separate ramekins. Once cooled down put in the refrigerator to set, remove from fridge approximately 30 minutes before plating.

At any point while the pork is cooking you can start to get the rest of the filling together. Heat a small sautee pan, add butter, chopped mushrooms and garlic, sprinkle with salt and pepper. Cook at a medium-high heat until all fluids are absorbed and mushrooms and garlic are browned. Put your sautéed mushrooms into a bowl and mix with the ricotta and parmesan cheeses. Place in refrigerator until the pork is ready. Once the pork is done cooking remove from it’s braising fluids and allow to cool at room temperature. Once cooled pull the meat from the bone using a fork. Add the meat to the bowl with the filling mixture, stir together and add the salt, pepper & garlic powder. Place in fridge until needed.

The next two steps will need to take place roughly 90 minutes before…

First we’ll start with the fennel broth. In a medium sauce pot melt your butter, add fennel, garlic, sugar, salt and pepper. Cook at a medium heat until the fennel and garlic start to sweat. Increase heat to high and add your white wine. Reduce the wine to half then add your chicken stock and bring to a boil. Reduce heat to low and continue to cook uncovered until ready to serve. If you realize towards the end that you cooked the broth at too high of a heat and lost too much fluid you can always add a bit more chicken stock or even hot water and allow to simmer for a bit longer. The reason for cooking this for so long is to get a more pronounced depth of flavor.

Once the broth is cooking on low it’s time to start with the pasta. Traditionally you would make the pasta in a bowl by hand, but this is the 21st century people. God invented Kitchen Aids for a reason! Put your flour in a mixing bowl. In a separate bowl whisk together your eggs, water and olive oil. Add to the flour and mix, starting slow and moving up to a medium speed. You’ll have to judge the pasta a bit on your own… if too dry while mixing add a touch more oil, too moist, more flour. Once mixed turn your pasta dough out onto a floured surface and knead until smooth and elastic, approximately 8-10 minutes. Wrap in plastic wrap and let rest at room temp for 30 minutes.

How’s that broth doing? Not reducing too much is it? Go check…

Pull your agnolotti filling from the fridge to let it come up in temp a bit.

Next, in a sautee pan or sauce pot at medium-high heat add your pine nuts, stirring regularly so you don’t burn them. You really need to keep a close eye on these. Once the oils start to release from the nuts they’ll burn in moments. Once browned remove from heat and set aside.

Now let’s work on the mushrooms to top the pasta. Get a sautee pan or medium sauce pot hot and melt your butter, then add your mushrooms, garlic, salt & pepper. Cook at a medium-high heat until fluids are absorbed and mushrooms and garlic are browned, set aside.

Ok, back to the pasta… you’ve now let it rest 30 minutes. If you’re lucky enough to have a pasta attachment for your Kitchen Aid, good for you, go ahead and use it. If you don’t, like me, get ready to use some muscle and do it old school. Turn the dough back out onto a floured surface and start rolling it out. Your goal is a thickness of roughly 1/16 of an inch. Once you’ve achieved this use a medium sized ring mold to cut out circles and set aside. Take your surplus and knead back together and start over. You should be able to get approximately 24 agnolotti from the batch.

Get a pot of salted water to a boil. Do it, do it now!

So let’s stuff the agnolotti. First, get a bowl of cold water and a fork. Take your pasta circles, one at a time stretch them out a little, place a spoonful (I use a teaspoon, not the measuring kind, the stir your coffee kind) of the filling in the center. Wet the edges with water and fold over. Use the fork to crimp the edges. To get rid of any excess pasta I use the ring mold to cut the edges down closer to the filled center. Set aside on an oiled plate (so it doesn’t stick to the plate, and they don’t stick to each other).

So now the mad rush to the finish line… First, get the large bowls that you’ll be serving in. Using a ring mold cut out circles from your panna cotta and place in the bowl. Boil your agnolotti until they start to float to the surface, roughly 2 minutes. Using a slotted spoon remove the agnolotti from the water and put in the fennel broth, just long enough to moisten. Plate the agnolotti, then spoon the broth over them forming a nice pool in the bottom (I try to avoid plating the sliced fennel, I prefer just utilizing the broth itself). Top with the roasted mushrooms and sprinkle with the toasted pine nuts. Take some of the fennel fronds and put on top for garnish (and added flavor, they’re great!).

One note, the panna cotta will start to melt into the broth… This is it’s intention! It’s not necessarily meant to be eaten on it’s own, it’s there to infuse the broth with that rich parmesan goodness.

That’s it, you’re good to go, serve it!

Now let’s talk about wine pairings… As stated above my whole basis for creating this dish was Salicutti’s Brunello di Montalcino. I strongly recommend a Sangiovese based wine that is slightly new world in style. So we’re looking at Sangiovese based Toscana IGT’s, Chianti’s, Brunello’s,  Vino Nobile di Montepulciano, or even funky small production Sangiovese from California . The reason I say you want something that’s slightly new world is because you want good fruit up front, but you still want a touch of that Sangiovese rusticity and dry tannic backbone. Another key component you’re looking for is a subtle note of anise on the palate. So listed below is what I would recommend.

Rodano Chianti Classico, Toscana, Italy – Never heard of Rodano? Well, you probably should have. The owner and winemaker, Vittorio Pozzesi, is the President of the Chianti Classico Consortium, so he’s kind of a big deal. As far as his wine goes, notes of sweet cherry, plum, anise and dried pantry spices play on the palate with subtle acidity and a subdued tannic backbone. At $16-19 on the shelf this wine is a steal! And with 8,000+ cases produced it’s not large scale production, but it can be found.

Field Stone Sangiovese Lucio’s Block, Alexander Valley, California – This wine is certainly difficult to find with only 275 cases made per vintage, but it’s worth the hunt! Chances are you’ll have to order it directly from the winery (http://www.fieldstonewinery.com/) at a very reasonable price of $25 per bottle. Notes of ripe cherry, dried cranberry and anise play with moderate acidity and round tannins, giving a beautifully structured mouth feel.

Podere il Macchione Vino Nobile di Montepulciano Riserva, Toscana, Italy – Seriously full bodied with notes of fresh berries, crushed mountain flowers, dried herbs (including anise) and tobacco. Macchione is a small family run winery with roughly 6 hectares of vineyard, producing Vino Nobile the way it’s meant to be made. Also not easy to find in the States, but if you can… grab it! You’re looking at mid-$30’s on the shelf.

Podere Salicutti Brunello di Montalcino, Toscana, Italy – Salicutti is a small winery, with only 5 hectares of vineyard, and they are the first producer in Montalcino to receive an organic certification. They only make about 700-750 cases of their Brunello per vintage. On the palate you’ll notice notes of red cherry, raspberry, anise and almond, with very subtle oak presence, moderate acidity and soft tannins that lead to a long, lingering finish. The current ’08 vintage is very young and needs at least 5 years before it starts to come into its own, but if you can find an older vintage hop on it! Or get the ’08 and sit on it… or open it two days before you want to drink it (seriously). This is the most expensive of the bunch, coming in at $70+ on the shelf.

8hr Braised Beef Short Ribs

Braised Short Ribs

So the weather is a bit nippy… pair that with the fact that I have been talking about old vine California wines all day and will be opening one this evening, and the equation equals “hmm, I need something with big flavor tonight!” Now I very rarely go to the store with a pre-conceived dish in mind. 98% of the time I wander around and let the ingredients talk to me, usually starting out with the protein and taking it from there. Today was no different with the exception that I knew I wanted something warming and big flavor… So what did the ingredients say to me today?

Beef short ribs.

Man oh man, doesn’t just hearing that make you feel warm and fuzzy inside? So now what if I say eight hour braised beef short ribs? Hmmmm… yeah, it just got better, I know. So the final product will be:

Eight hour braised beef short ribs over egg noodles tossed with shiitake mushrooms, shaved brussel sprouts, & white onion, finished with a natural jus and garnished with roasted carrot & parsnip ribbons. Wine this evening will be Carlisle’s 2010 Monte Rosso Vineyard Zinfandel from Sonoma Valley (410 case production, 95pt Wine Advocate).

So here’s the recipe:
*note – Please bear with me, I have always cooked by feel and taste and very rarely measure anything, so writing a recipe is a new territory for me! I’m sure I’ll get better over time… lol. If you have any questions about the recipe feel free to reach out.

Serves 4

2lb  Bone-In Beef Short Ribs

For rub:
2tsp Salt
1tsp Ground black pepper
1tsp Garlic powder

For braise:
2tbsp Olive oil
1 Medium white onion, peeled and diced
6 Garlic cloves
3 Medium parsnips, peeled and diced
3 Medium carrots, peeled and diced
1 Large Sweet Potato, peeled and diced
3tsp Salt
3tsp Ground black pepper
2tsp Smoked paprika
2tsp Chili powder
2tsp Crushed red pepper flakes
1tsp Cayenne pepper
1tsp Cumin
1tsp Garlic powder
2c Red Wine (I prefer something full bodied)
4c Beef Broth
4c Water
20oz Canned diced tomatoes

For pasta:
12oz Egg Noodles (I prefer broad/hearty style)
2tbsp Unsalted butter
1 Small white onion, peeled and sliced
3 Cloves garlic, chopped
4oz Shiitake mushrooms, sliced
4oz Brussel sprouts, shaved

For garnish:
3 Medium parsnips, peeled and sliced into ribbons longwise using a peeler
3 Medium carrots, peeled and sliced into ribbons longwise using a peeler
1tbsp Olive Oil
1tsp Salt
1tsp Ground black pepper
1tsp Garlic powder

*note – I prefer to use a large sauce pot on the stove for braising as I feel it allows me to maintain greater control over cooking and monitor flavors. If you are using a hotel pan  in the oven you may need to adjust the amount of fluids to make sure that the short ribs are covered during the braise. Also, if you are making a larger serving size for the short ribs you do not need to increase the amounts for the braising ingredients.

Instructions:

Coat the short ribs with the salt, pepper and garlic powder. Heat the 2tbsp of olive oil in a large sauce pot, then sear the short ribs on high heat on all four sides to get a nice crust. Reduce the heat to medium and add your onion, garlic, parsnip, carrot and sweet potato. Sprinkle the vegetables with salt and cook on medium heat until they begin to sweat/caramelize. Increase the heat back to high and add your red wine. Allow to reduce until half of the original amount, then add beef stock, water, diced tomato and remaining seasoning. Bring to a boil for five minutes, then reduce heat to low and cover. Cook for 8 hours, periodically stirring. By the end of the braising time the fluids should be approximately half of where they started and the bones will likely have fallen out of the short ribs.

The remaining items can be started when there is approximately 30 minutes left on the braise (assuming prep is done).

Heat your oven to 375 degrees. Toss your parsnip and carrot ribbons with olive oil and seasoning. Place on baking sheet and cook for approximately 20 minutes, periodically stirring the ribbons to promote even cooking. If you see the ribbons starting to burn pull out earlier than the allotted time. Set to the side at room temperature to allow to cool slightly.

Ladle out five cups of the braising fluids and vegetables, liquefy with a blender or hand emulsifier, set to the side.

In a sautee pan melt your butter and add your vegetables for the pasta. Cook at a medium high heat until the mushrooms and sprouts start to brown. Reduce heat to low until needed.

Bring salted water to a boil in a sauce pot for the egg noodles. Cook for three minutes less than the time specified on the package. Drain your noodles and then put back in the now empty sauce pot. Add the 5 cups of liquefied braising jus to your pasta and simmer at a medium heat for 5 minutes. While simmering remove your short ribs from the braise and set aside at room temp to briefly rest. Add your sautéed vegetables into the noodle/jus pot and toss.

Plate your noodles, top with your short ribs and drizzle with jus left in the sauce pot. Top with a nest of the roasted parsnip and carrot ribbons.

Serve with your favorite full bodied red wine and enjoy!!!

%d bloggers like this: